| PLANS: adjustable shelf |
| plans | ||||||||||||||
|
||||||||||||||
| resources | ||||||||||||||
| gallery | ||||||||||||||
| faq | ||||||||||||||
|
|
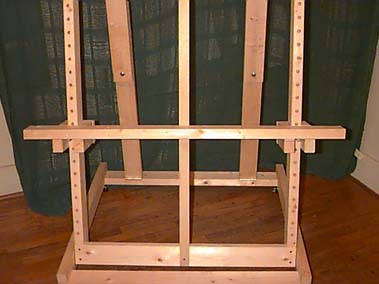
The adjustable shelf is just that; it allows you to change the height at which the painting is supported; both to allow accomodate large supports, as well as to provide a comfortable painting height for sitting and standing. |
|
 |
|
| fig. 1: shelf front angle | |
|
Others who have built this easel have tried
various modifications of this shelf design. One person used joist
hangers to support the shelf. Another put a slot in the main support
and tightened the shelf into place, like I do with the rear supports.
See the gallery for more on
these modifications.
|
|
| fig 2: shelf diagram (measurements) |
|
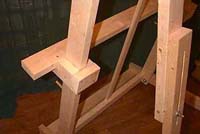
The shelf is made up of two identical U-shaped pieces which attach to the shelf itself. The shelf is a simple a 4' 2x4. Each U piece wraps around the vertical outer pieces of the main support (see figure 3). The best way to measure up this piece is to lay the pieces up against your actual support and mark the pieces so they fit just right. However, my measurements should be close and give you a starting point. The idea is to make the center gap *just* the width of the main support piece, so that the U piece can slide firmly up and down the support. The order to build this is to build each U-shaped
piece first. Then, once you have those done, put them in place on
the main support, lay the shelf on and try it out while holding
the shelf and U-pieces together with your hand. If it's satisfactory,
put a couple screws in each shelf while its actually in place (at
his point, you have no other way to actually get the shelf on the
thing). |
|
|
|
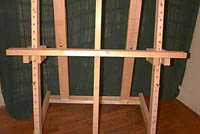
 fig 4: shelf (up) |
|
I borrowed a tool called a 'dowel-cutting jig' to drill the holes accurately. The jig is basically a clamp with a guide in it. You set the guide where you want (in this case, so that the center of the hole is in the center of the support), clamp it into place, and drill away. This helped me keep each hole nicely lined up. You could do this w/o, but if you can borrow one of these things, it makes it easier. They cost about $30 (too much for one use), but my dad had one in his basement he hadn't used in 30 years that worked perfectly (and the pricetag on the box was $6!). Finally, cut a couple pieces of 1/2"
dowel and slip them into place. Proceed to the next step: top clamp ... |
|
