| GALLERY |
| plans |
| resources |
| gallery |
| faq |
|
|
|
Dear Sir,
Benjamin, Hi Benjamin, I am going to try and build the easel for my wife who wants to take up painting again now that her kids have moved out of the house she has time and space to set up an art room again. We had a look at some shops to buy an easel but
they are so expensive that for the few materials you need its better
to make one yourself. Henri S. Hallo ! I want to thank You for making that useful site - "building your own easel". It really helped me a lot in my moneyless situation. It is the best site on this topic that I could find on all of the net, and well made too - I`m telling You that as a The Golden Web Awards winner myself. It should be more sites like yours on the net. With thanks from Latvia. Una. Thank you for the free easel plan I will build myself one. Steven S., Ville de Léry, Quebec, Canada.
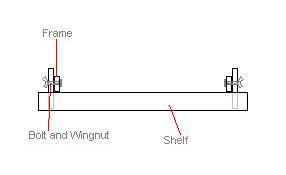
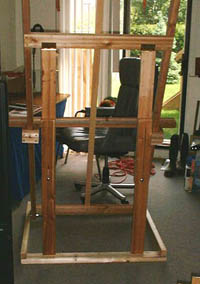
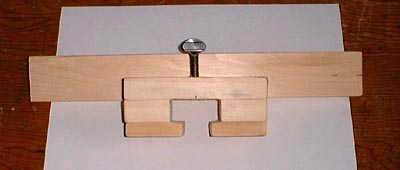
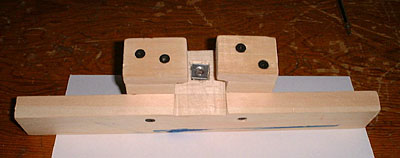
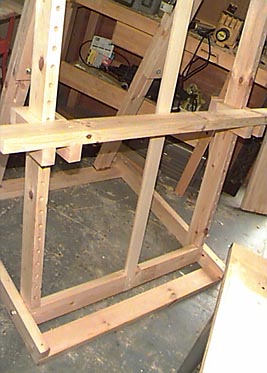
I just built a easel based on your design but with a bunch of changes to adapt it to what I needed.I used Oak, so I ended up spending about 40 dollars more. I needed it to be a lot lighter because the room I use to paint also serves as a guest room and when my family comes to visit it needs to go in storage. Anyway, here is a picture of it and Thanks again for posting those instructions, they were very helpful. > (question by ben) How does that method
for raising and lowering the shelf work?
Hi Ben, Dear Ben, Benjamin, Thanks so much for providing the plans for building an easel not to mention the inspiration of your art. I'll let you know how it turns out. The easel will be a great addition to my studio. Thanks! Fred M.
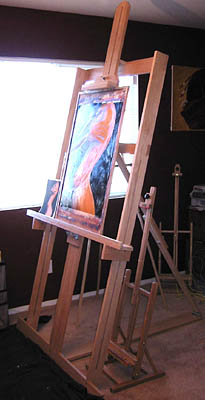
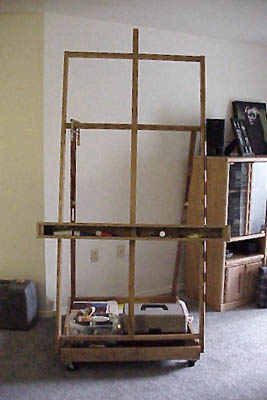
As you can see I am already using it and it works
great. I only had an old jigsaw with a crocked table to cut out
the slots for the crossmembers but all in all it doesn't look bad
considering I'm not much of a carpenter. I modified the top clamp
as you can see to make it easier for me to build. I also added an
aluminium angle bracket to the shelf to support the base of the
canvas from falling through. Sorry for the picture quality. I couldn't
stand back far enough in my area. I think I will also add another
bolt above the present bolt on the vertical supports to hold them
al little better. They probably won't be adjusted too often by very
much anyways so I'll put Pat K.
I have completed it.
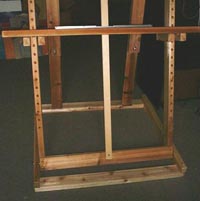
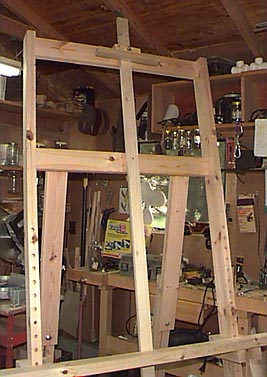
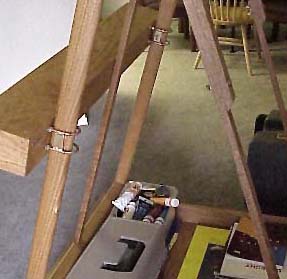
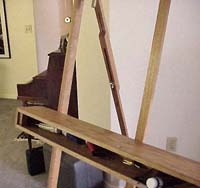
Benjamin- Thank you for posting your easel plans on the net. Based on those plans, I built my daughter one for a college graduation present. Since you indicated on the page that you are interested in feedback, I thought I would drop you this email. I built the easel to your basic specifications but modified it slightly and added a few features. I chose oak for the material of construction which increased the cost considerably, but my daughter considers it a nice piece of furniture in addition to a painting tool and displays it proudly in her living room. The vertical rails I got from Home Depot; they are milled stair rail. I added a bottom to the base, so she could store paints and stuff there. The shelf is has adjustable brackets that use thumbscrews to provide a pressure grip to the vertical side rails. The shelf is made so she can throw brushes and stuff into it. The tilt adjustment rails have a bolt with wing nuts that is slotted through the mated piece, but I also used a keyway router bit to slot the top piece where a hidden screw slides along the keyway to hold the tip of the rail opposite the bolt together with it's mate. Your suggestion to use 3-in. casters was a good one. I've attached pictures FYI. Let me know if you have any questions about what I did. Again, thank you for providing the basic design
and inspiring me to take up Cheers,
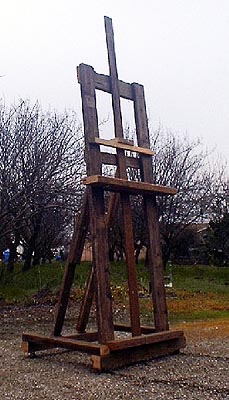
Dear Benjamin, Many thanks for your plans. They have proved to be excellent. My son is doing an Art and Design course in Bristol, England. He needed an easel for his course. The largest
paintings have been five feet Your design is simple, elegant and adaptable. I scaled the main frame down to thirty inches by seventy two inches. I used twenty millimetre by seventy millimetre,
planed all round, pine for I did have some difficulty in sourcing the Thumb
screws and 10 millimetre I used two casters for the back of the lower frame
and fixed blocks at the Thanks again Alan B. Hi Benjamin, Just a note to thank you for an excellent site. I recently built an easel to your very efficient design and my son - in - law, the artist for whom it was intended, is quite thrilled. I made one or two minor adjustments as follows.
I had to break down the easel for ease of transportation via ferry
and 'bus so utilised 2 x 3 for the uprights and 1 x 4 for the base
and cross braces, (spruce), for lightness. The shelf supports seemed
a little bulky to me so instead of wood I used two metal joist hangers
which wrapped around the uprights nicely and slide easily up and
down, for the shelf I used 3/4" plywood as I had some lying
around. The clamp to hold the top of the canvas was made from an
old nylon cutting board,(1/2"), which responded nicely to cutting,
is All in all the finished product is light, strong, and aesthetically pleasing. It was also inexpensive, cost for the whole thing was approximately $65.00 Canadian, about US$45.00. Thanks again for the great design and for sharing it with the world. Regards, Richard W. > ben asks for some elaboration on the design... Hi Ben, Hope this is hepful. Again, thanks for the design, Regards, Richard Thank you, thank you, thank you. I had begun pricing easels because I am taking
painting classes at the local community college and needed to work
at home in a large format. There was Thanks for the instructions. You have saved
us a lot of time or completely ruined my next month! Although I
have been using a tripod easel for even 6x4 foot paintings, I have
now been offered a studio and need an easel that looks proper. If
it's completed we will send you an image for your easel gallery.
|